
- What Are The Signs
- How Long Does It Take
- What Are The Steps
- How Much Does It Cost
- What Tools Do You Need
- What Are The Benefits
What Are the Signs That You Need to Replace Your Alternator?
The alternator is an essential component of a vehicle’s electrical system, as it is responsible for generating the electricity needed to power the car’s accessories and recharge its battery. As such, it is important to be aware of the signs that indicate your alternator may need replacing.
- One common sign that your alternator needs replacing is dim or flickering headlights. This can be caused by a failing alternator, as it will not be able to generate enough electricity to power all of the car’s accessories and keep its battery charged.
- Another sign that you may need a new alternator is if your dashboard warning lights come on when you start your engine. This could indicate an issue with the charging system, which could be caused by a faulty or failing alternator.
- You may also notice strange noises coming from under the hood when you start up your engine; this could mean there are issues with one or more components in the charging system, including the alternator itself.
- Finally, if you experience difficulty starting your vehicle or find that it stalls frequently while running, this could also point towards an issue with your car’s charging system and suggest that you should have its alternator checked out by a professional mechanic.
How Long Does It Take to Replace an Alternator in a Car?
Replacing an alternator in a car typically takes between two and four hours, depending on the make and model of the vehicle. The process involves removing the old alternator, installing a new one, and then reconnecting all of the necessary wiring.
In some cases, additional steps may be required to ensure that all components are properly connected. It is important to note that this time frame does not include any diagnostic work or other repairs that may be needed before replacing the alternator.
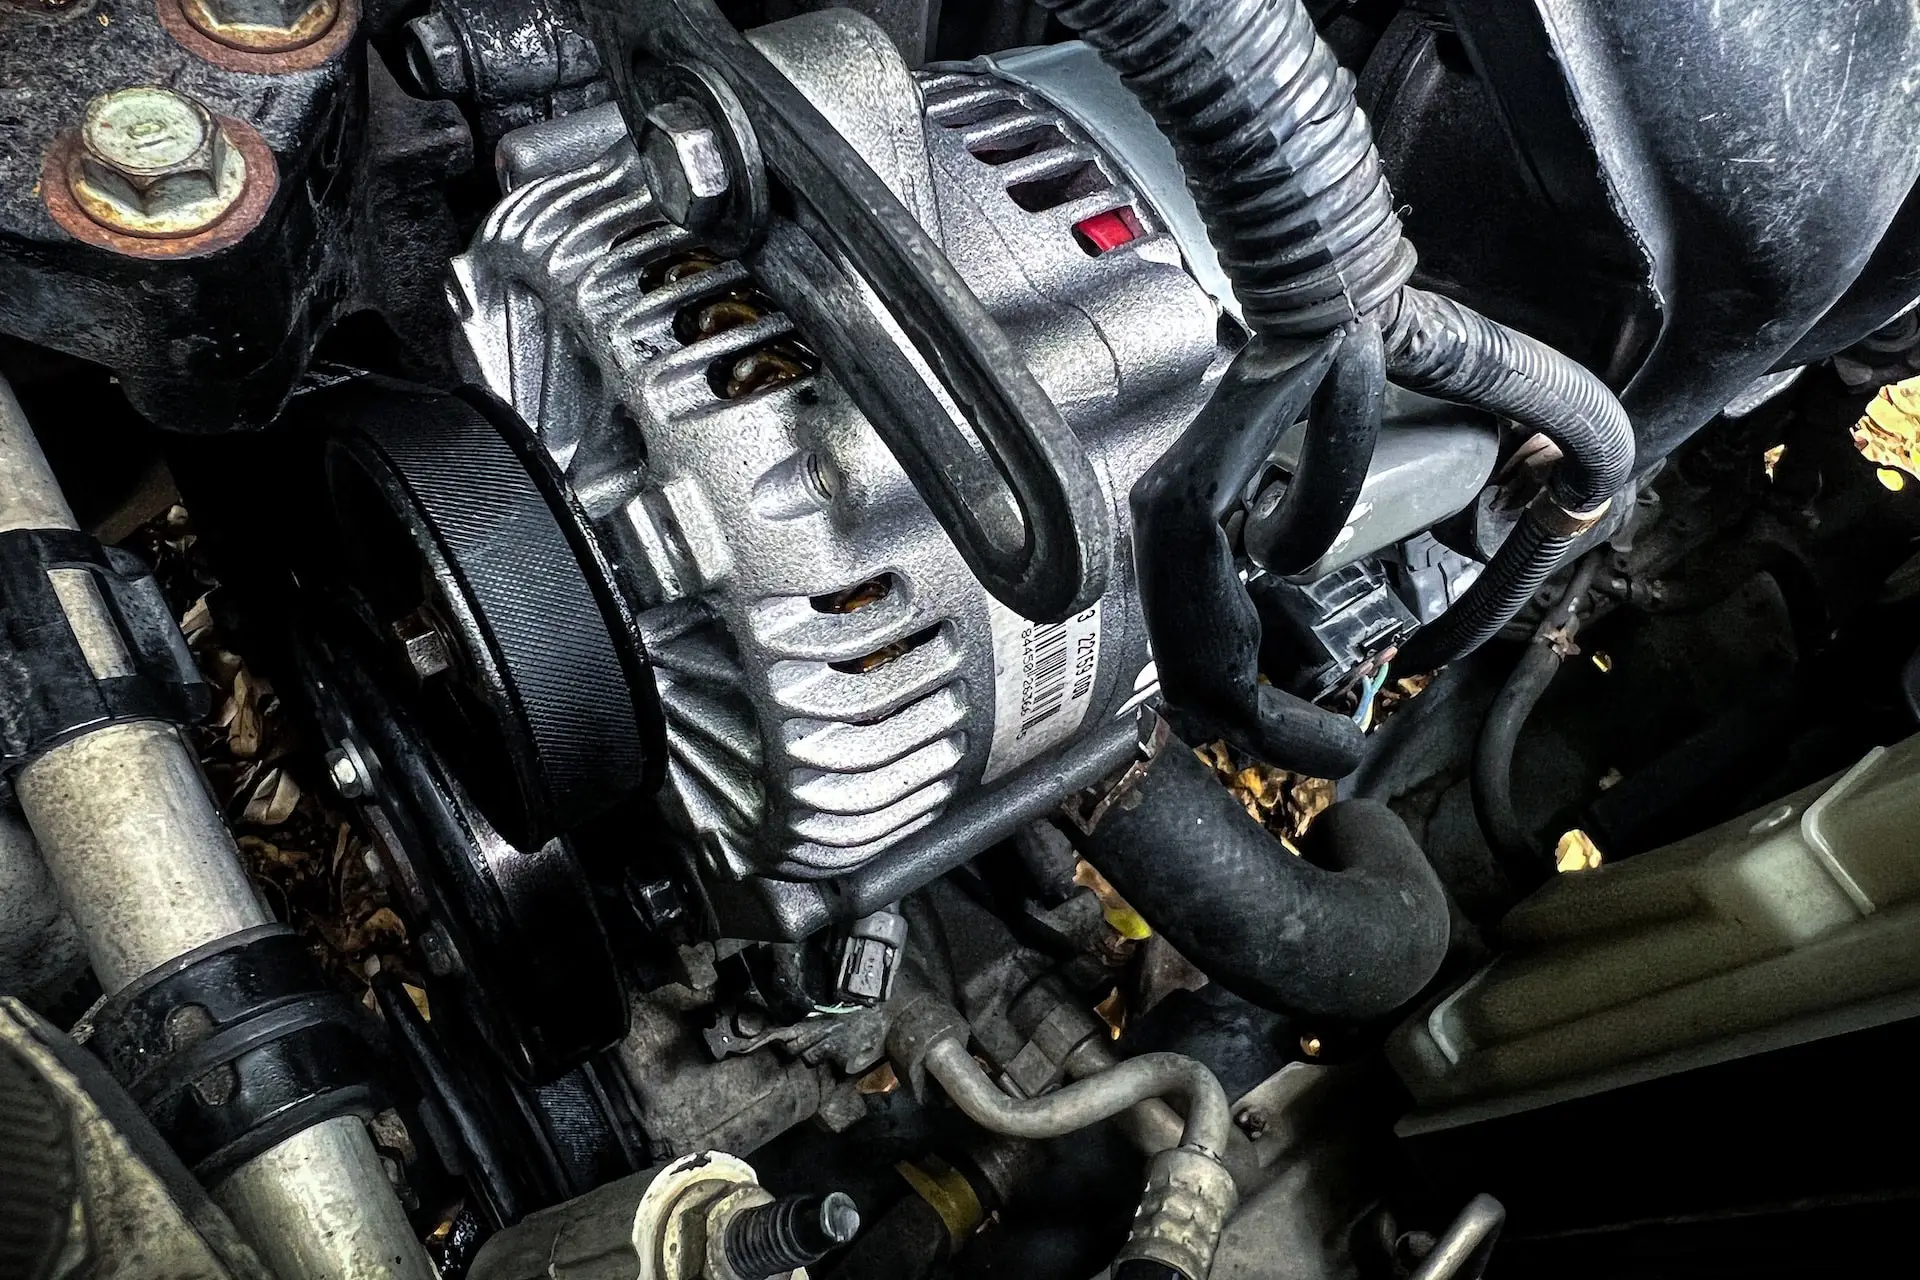
What Are the Steps Involved in Replacing an Alternator?
Replacing an alternator and changing the alternator is a relatively straightforward process, but it does require some mechanical knowledge and the right tools. The following steps outline the process for replacing an alternator:
1. Disconnect the negative battery cable from the battery terminal. This will prevent any electrical shock or damage to your vehicle’s electrical system while you are working on it.
2. Remove any components that may be blocking access to the alternator, such as air intake ducts or other engine components.
3. Unbolt and remove the old alternator from its mounting bracket using a wrench or socket set, depending on what type of bolts are used to secure it in place.
4. Install the new alternator in its place and bolt it securely into position with a wrench or socket set, again depending on what type of bolts are used to secure it in place.
5. Reconnect all wiring harnesses that were disconnected when removing the old alternator, making sure they are connected correctly according to their labels or diagrams provided by your vehicle’s manufacturer if available (this step may vary depending on your vehicle).
6. Reattach any components that were removed during installation such as air intake ducts or other engine components if necessary (this step may vary depending on your vehicle).
7. Reconnect the negative battery cable back onto its terminal and start up your car to make sure everything is working properly before taking it out for a test drive.
How Much Does It Cost to Replace an Alternator?
The cost of replacing an alternator can vary greatly depending on the make and model of the vehicle. Generally, a new alternator will cost between $200 and $400, while a remanufactured one may cost between $100 and $300. Labor costs for installation can range from around $50 to over $200, depending on the complexity of the job.
In addition to these costs, you may also need to purchase additional parts such as belts or hoses that are necessary for installation. It is important to note that some vehicles require special tools or expertise to replace an alternator, which could increase labor costs significantly.
What Tools Do You Need to Replace an Alternator?
Replacing an alternator requires a few tools to ensure the job is done correctly and safely. The following tools are necessary for replacing an alternator:
1. Socket set: A socket set with various sizes of sockets and extensions will be needed to remove the bolts that hold the alternator in place.
2. Wrench set: A wrench set with various sizes of wrenches will be needed to loosen and tighten any nuts or bolts that may need adjustment during installation.
3. Ratchet: A ratchet is necessary for loosening and tightening any nuts or bolts that may need adjustment during installation, as well as for removing the old alternator from its mounting bracket.
4. Pliers: Pliers are necessary for removing any electrical connectors from the old alternator, as well as connecting them to the new one once it has been installed in place.
5. Wire cutters/strippers: Wire cutters/strippers are necessary for cutting off any excess wire when connecting electrical components to the new alternator, such as battery cables or voltage regulator wires, if applicable on your vehicle model year and make.
Is It Possible to Diagnose and Repair a Faulty Alternator Yourself?
Yes, it is possible to diagnose and repair a faulty alternator yourself. However, it is important to note that this task requires a certain level of technical knowledge and skill. It is also important to have the right tools and safety equipment for the job and learn how to check if the alternator is bad.
The first step in diagnosing a faulty alternator is to check the battery voltage with a multimeter or voltmeter. If the voltage reading is lower than 12 volts, then there may be an issue with the alternator. The next step would be to check all of the connections between the battery and alternator for any signs of corrosion or damage. If any are found, they should be cleaned or replaced as necessary before continuing with further diagnosis.
Once all connections have been checked, you can then test the output of your alternator using an ammeter or clamp meter. This will allow you to determine if there are any issues with its performance such as low output voltage or current draw that could indicate a problem with its internal components.
If you find that your alternator has failed due to internal component failure, then it will need to be removed from your vehicle for repairs or replacement parts installation can take place. Once removed from your vehicle, you can inspect each component individually for signs of wear and tear such as burnt-out diodes or loose wires which could indicate an issue requiring repair work before re-installation into your vehicle takes place again safely and correctly.
In conclusion, while it is possible for someone who has some technical knowledge and skill along with access to appropriate tools and safety equipment can diagnose and repair their faulty alternator themselves; however, caution should always be taken when attempting this type of work on one’s car due potential risks involved if done incorrectly.
Should You Consider Buying a Rebuilt or Remanufactured Alternator Instead of a New One?
When it comes to replacing an alternator, many people are faced with the decision of whether to buy a new one or a rebuilt or remanufactured one. While buying a new alternator may seem like the obvious choice, there are several advantages to considering a rebuilt or remanufactured option.
- First and foremost, rebuilt and remanufactured alternators can be significantly less expensive than buying new ones. This is because they have been taken apart and inspected for any worn parts that need to be replaced before being put back together again. This means that you can get the same quality product at a fraction of the cost of buying a new one.
- Another advantage is that these types of alternators often come with warranties from their manufacturers, which can provide peace of mind in case something goes wrong down the line. Additionally, since they have already been tested and inspected for any potential issues before being sold, you can rest assured knowing that your purchase will last for years to come without needing additional repairs or replacements.
- Finally, opting for a rebuilt or remanufactured alternator helps reduce waste by keeping old parts out of landfills and reducing the demand for resources needed to produce brand-new products from scratch.
In conclusion, while purchasing a brand-new alternator may seem like the best option at first glance, there are several benefits associated with choosing either a rebuilt or remanufactured model instead. Not only do these options offer significant savings over buying new but they also come with warranties and help reduce waste in our environment as well.
What Are the Benefits of Installing a High-Performance Aftermarket Alternator in Your Vehicle?
Installing a high-performance aftermarket alternator in your vehicle can provide numerous benefits. Firstly, it can increase the power output of your vehicle’s electrical system, allowing you to run more electrical components without overloading the system. This is especially beneficial for vehicles with additional audio and lighting systems installed.
Secondly, a high-performance alternator will be able to charge the battery faster than a standard alternator, meaning that you won’t have to worry about running out of power while driving. Finally, an aftermarket alternator is often more reliable than its stock counterpart and may last longer before needing replacement.
Overall, installing a high-performance aftermarket alternator in your vehicle can provide numerous benefits such as increased power output for additional electrical components, faster charging times for the battery, and improved reliability compared to stock alternatives.
How Can You Tell If Your Vehicle’s Battery or Charging System Is Failing Before Replacing the Alternator?
If your vehicle’s battery or charging system is failing, there are several signs that you can look out for before replacing the alternator. Firstly, if your vehicle’s headlights dim when the engine is running, this could be a sign of a failing battery or charging system (which is crucial to understand if you want to tell the difference between a bad alternator vs a bad battery).
Secondly, if your dashboard lights flicker when the engine is running, this could also indicate an issue with the battery or charging system. Thirdly, if you notice that your vehicle takes longer than usual to start up after turning off the ignition switch, this could be another sign of a failing battery or charging system.
Finally, if you hear any strange noises coming from under the hood while driving such as grinding or whining sounds coming from near the alternator belt area then it may be time to replace it. If any of these signs are present in your vehicle then it would be wise to have it checked by a professional mechanic before replacing the alternator.
What Safety Precautions Should Be Taken When Working on Your Vehicle’s Electrical System
When working on a vehicle’s electrical system, including replacing an alternator, it is important to take certain safety precautions. First and foremost, always disconnect the battery before beginning any work on the electrical system.
This will prevent electric shock or short circuits that could cause injury or damage to the vehicle. Additionally, be sure to wear protective gear such as gloves and safety glasses when handling any wiring or components of the electrical system.
It is also important to use caution when working around moving parts such as belts and pulleys associated with the alternator. Be sure to secure these parts with a wrench or other tool before attempting any repairs or replacements.
Finally, be aware of any exposed wires that may have been disconnected during your work (or other parts like the alternator fuse); these should be taped off securely so they do not come into contact with other components in the engine bay.
By following these safety precautions when working on your vehicle’s electrical system, you can help ensure that you complete your repairs safely and successfully without causing harm to yourself or damage to your car.