How to change brake pads? If you’re in the market for new brake pads and rotors, you’ve probably noticed a high-pitched screaming noise when you press the brake pedal. This is their way of alerting you to the fact that your brake linings need to be replaced.
The lining of a brake pad is a friction material that wears out every time the brake pedal is pressed. Heavier braking at high speeds or with heavy loads, as well as frequent downhill travel, all contribute to brake pad degradation until nothing remains except metal-to-metal contact between brake pads and rotors.
As a result, stopping power is greatly diminished, which is never a good thing. So, how long do brake pads and rotors typically last? Brake pads should be replaced every 20,000 to 50,000 miles, depending on driving conditions and driving behavior.
Fortunately, changing brake pads and rotors before they reach this crucial stage only takes a few hours and requires only a few basic tools and supplies. In this guide, you will know how to change brake pads.
- What are Brake Pads?
- Factors that Influence?
- Signs of Failure?
- How to Replace?
- How to Extend its Life?
- FAQs
Brake Pads – What Are They?
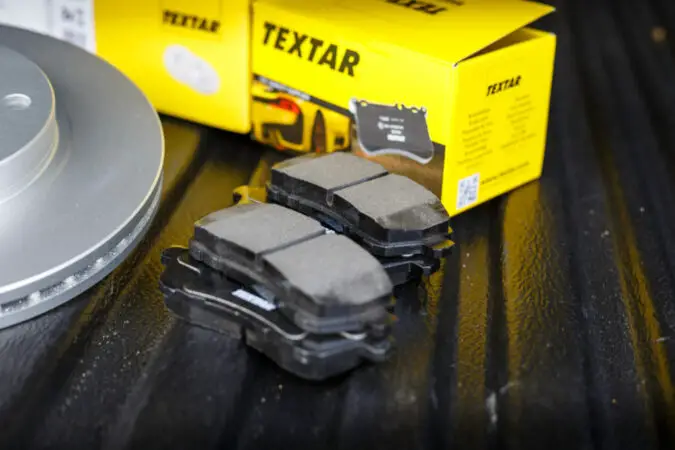
There are two types of brakes used on passenger vehicles: disc brakes and drum brakes. Both use friction to slow down your car, but there are major differences. When the driver applies the brakes, “pads” of specifically engineered bits of friction material made of biological, metallic, or ceramic substances are pushed against a rotor or “disc.”
The car is slowed as a result of the friction. All current passenger vehicles have disc brakes on the front axles, and many have them on the back axles as well. The friction material is used in drum brakes, much as it is in disc brake pads, but it is attached to half-moon-shaped “shoes” that push against the inside of a drum when you step on the brakes.
The car is slowed as a result of its contact with the drum. Drum brakes were once popular on all four wheels (fun fact, go check out our explainer on how many wheels are in the world), but they are now only found on the rear axle of modern cars and light trucks. Pads and shoes both degrade with wear, so having them evaluated on a regular basis is crucial to keeping track of their condition.
If brake discs or drums are allowed to wear out before being changed, other components of the brake system may be affected. Driving with worn brake pads or shoes might put you in dangerous circumstances and cost you money in repairs.
What Factors Influence Brake Pad And Rotor Life?
The following are some of the conditions that can cause your brake pads or rotors to wear out faster than normal:
Driving Practices:
When you push the brake pedal, the brake pads make contact with the rotors. As a result of the friction, heat is generated, which causes the pads to wear down over time. The pads and rotors may wear down faster if you ride the brakes or brake forcefully, so you may need to repair them sooner than intended.
Driving Locations:
If you spend most of your driving time in regions with traffic, stop signs, and signal lights, you’ll have to apply the brakes more frequently than if you spend most of your time on the interstate, and your brake pads and rotors will wear out faster.
When Should Brake Pads And Rotors Be Replaced?
Brake pads should be replaced every 25,000 to 65,000 miles, while rotors should be replaced every 30,000 to 70,000 miles. However, the exact number can vary depending on driving conditions and styles.
The good news is that when your brake pads are nearing the end of their useful life, you’ll likely notice mild symptoms, making diagnosis and repair simple. Are you unsure if your brake pads or rotors need to be replaced? Here are six common indicators that it’s time for rotors and brake pad replacement.
1. Brake Squeaking Or Squealing
A squeaking or squealing noise emanating from the brakes is the first indicator you’ll notice if your brake pads are nearing the end of their useful life. The most common reason for screaming brakes is excessively worn brake pads. You’ll hear a grinding noise when your pads are worn down enough, and you’ll start to damage your rotors, increasing the expense of repair.
2. Grinding Noise While Braking
If you hear a grinding sound when applying braking pressure, you should replace your brake pads as soon as possible. Metal wear indicators are integrated into some brake pads, and they emit a loud noise when it’s time to replace them. If you let the brake pads grind any longer, you risk causing further damage and incurring more repair costs.
3. Brake Vibration
Another symptom that your vehicle’s braking system requires professional attention to is vibration when you press the brakes. It’s likely that your rotors are deformed, which has resulted in uneven brake pad wear.
4. Taking More Time To Stop
When applying the brakes, the lack of performance is another key symptom that your brakes need to be checked out. If you’re having trouble stopping when you press the brakes, it could be because your brake pads are entirely worn out, or your brake fluid is low due to a leak.
You’ll want to see a brake change near me as soon as possible to obtain a true picture of what’s going on with your brakes and to avoid losing all braking ability.
5. The Brake Pad Indicator Light Is On
Most modern automobiles include brake warning lights that flash on the dashboard. The braking system warning light and the antilock brake system (ABS) light are two separate lights.
Your brake light will not always illuminate when there is a problem; it is also the light that illuminates your dashboard when your parking brake is applied. If your parking brake isn’t engaged and you notice a brake warning light, it’s time to consult a brake professional.
6. Your Brake Pads Appear To Be Worn Out
One simple way to keep track of your brake pads’ condition is to visually inspect them for wear. Look between the spokes of your wheels to find your brake pad. If it seems to be smaller than 14 inches or 6.4 mm thick, you’re undoubtedly in need of new brake pads.
The Tools You’ll Need Before You Start
You’ll need a few tools before you begin. Some of these are likely to be found in your home, while others may necessitate a visit to the car parts store or you can find brake change near me. Some of these instruments have a large initial investment, but you can use them indefinitely. You’ll save more money in the long run if you buy them now and conduct your own repairs afterward.
- Owner’s Guide
- Brake Tool
- Jack Stands
- Brake Tool
- Floor Jack
- Brake Pads (replacement)
- Rotor Replacement (if necessary)
- Brake Grease
- Tire Iron
- Socket Wrench
Changing brake pads is a simple procedure; however, some automobile types may require special attention. Check your owner’s manual if you come across something on your car that doesn’t match.
If your owner’s manual isn’t clear on the details, a helpful YouTuber with a video showing a brake pad change on your specific automobile is usually always available. Check it out first to be sure you know what you’re looking for before getting under your car.
Brake Pad Replacement
Step 1: Remove The Wheel
Make sure your car is parked on a level, flat area and that your parking brake is engaged before you begin. This is to keep your car from rolling off the jack and causing damage. You can use the scissor jack and tire iron that came with your vehicle if you don’t have a floor jack or a breaker bar that fits your wheel’s lug nuts.
If you use a breaker bar with a socket, make sure it is the correct size for the lug nuts, or you may round off the corners, making removal harder. Before jacking up the vehicle, release the lug nuts on the wheel using your tire iron or breaker bar. It’s far easier and safer to accomplish this while the car is firmly on the ground, as loosening them may require a lot of force.
If you’re having trouble loosening the lug nuts, try putting yourself in a position where you can use your body weight. Elevate the car using the jack points specified in your vehicle manual with your floor jack or scissor jack. Place your jack stand in place to support the car once the wheel has cleared the ground.
You’ll need a jack stand if you’re using a hydraulic floor jack to keep it from falling over. Even though a scissor jack is less prone to move, I still recommend jack stands because it’s better to be cautious than sorry.
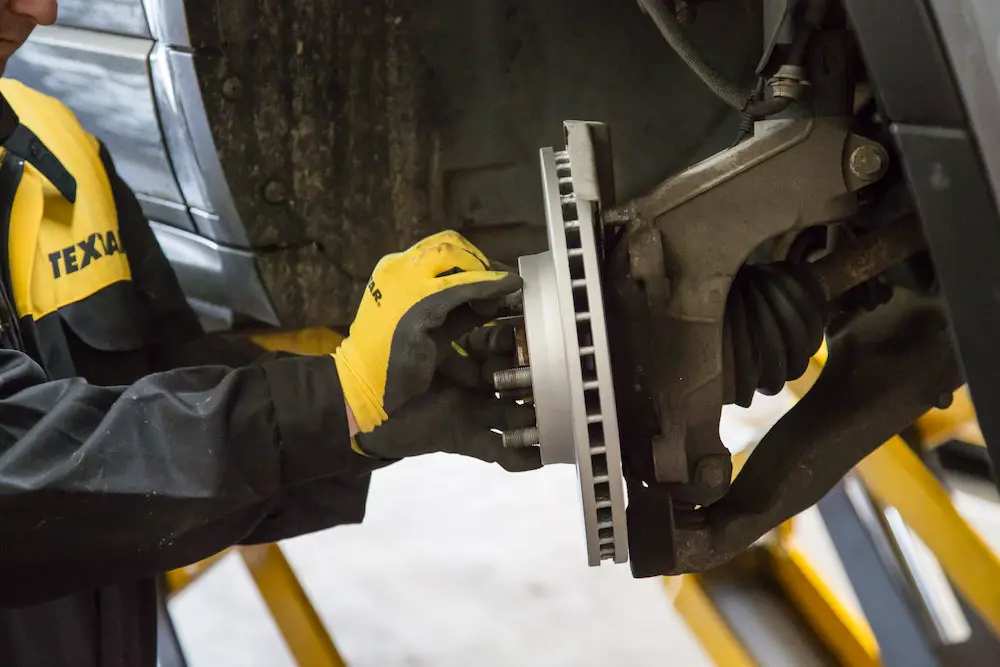
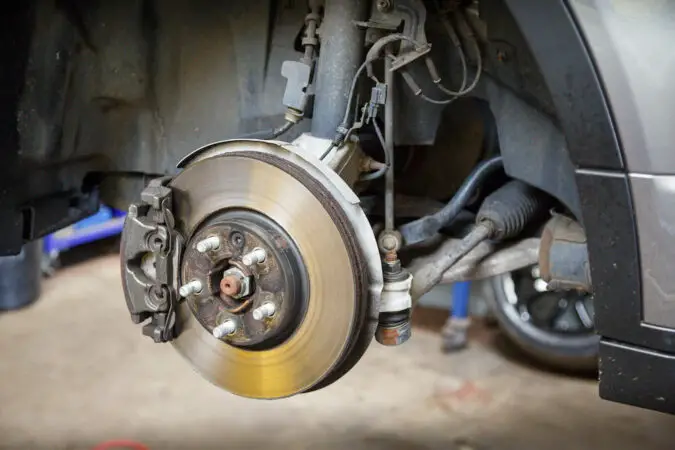
Remove the lug nuts while the wheel is safely elevated. After they’ve been removed, slip the wheel off the hub and set it aside. The brake caliper and rotor are now within reach.
Step 2: Remove The Old Brake Pads And Open The Piston
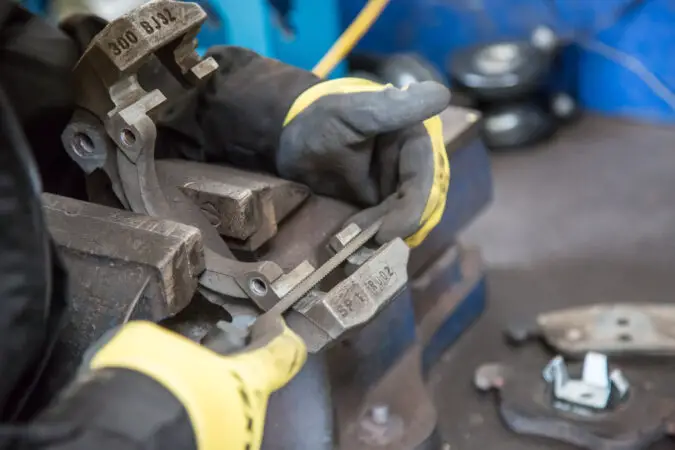
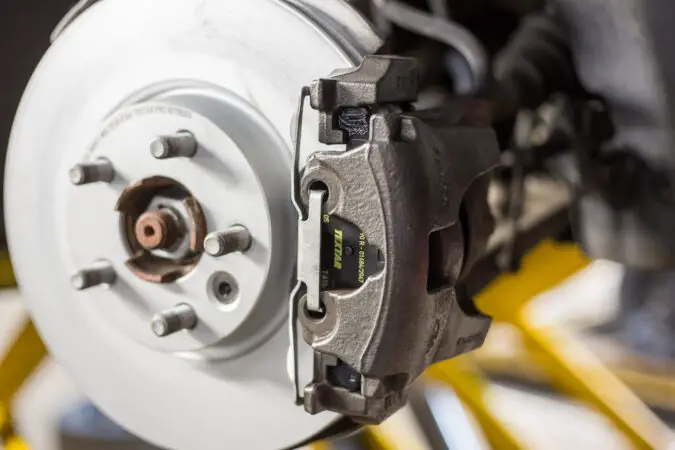
To access the brake pads, we’ll have to open the caliper. Two bolts secure the caliper in place. To spin the caliper away from the rotor, you simply need to remove one of them. Because the brake line is normally short, remove the bottom bolt and rotate the caliper up.
The caliper should spin up after the bolt is removed. To keep the caliper bolt bushing from spinning, a second wrench may be required. You haven’t initiated loosening it if it rotates with the bolt. Some brake pads have little rivets on the rear that can snag on the piston’s edge.
If you can’t spin the caliper, try compressing the piston with a wrench, screwdriver, or c-clamp to clear the rivets. Before squeezing the piston, open the bleeder screw (with some pointers on how to get air out of brake lines without bleeding) on the back of the caliper to avoid injuring hydraulic components.
While the caliper is open, you can remove the old pads from the rotor and from the brake assembly. Keep an eye out for any differences in the internal and exterior brake pads. As the pads degenerate, the piston remains in a more “closed” position.
In fact, it wouldn’t fit over your new pads due to their increased thickness. To return the piston to its completely open position, you can compress it with a C-clamp. Part of the hydraulic system’s brake fluid is forced back into the master cylinder during this procedure.
This is also a good time to inspect the rotors for any excessive or uneven wear. Excessive braking can warp rotors, which can thin over time. You’ll notice that the brakes throb when you apply them. Repairing or replacing rotors is possible. If your rotors show any signs of wear, you may want to put off replacing your brake pads until the rotors are repaired.
Step 3: Replace Brake Pads
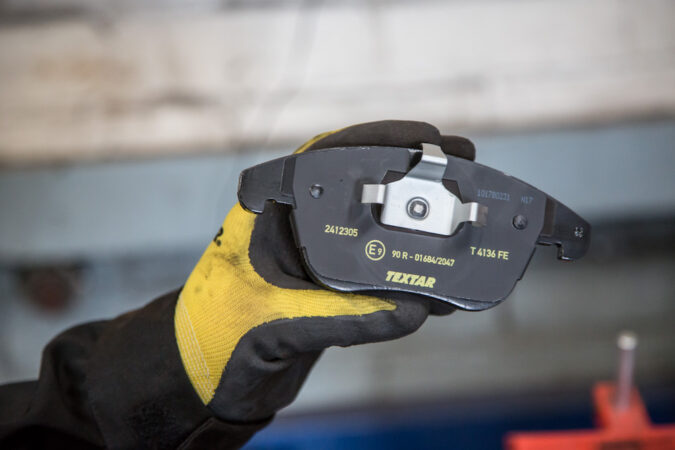
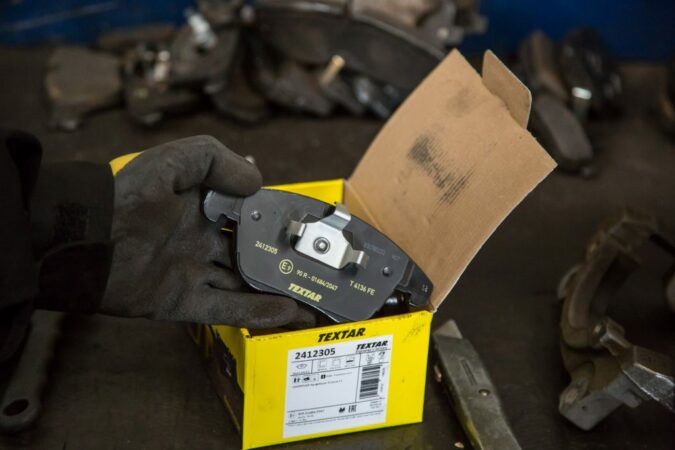
We’re now ready to put the new pads in place. Small tabs on each end of the pads usually fit into a pair of notches at the top and bottom. Seat one tab in the bottom notch, then twist the pad into position and press the upper tab into its notch.
Work on the inner brake pad again. The inside and outside pads may differ in shape or have distinct metal tabs. Just make sure you’re placing the pads the exact way you saw them before. To extend the life of the system, add brake lubricant to the piston, bushings, bolts, and other components. The friction surfaces of the pads and rotors should not be lubricated.
Step 4: Make The Caliper Tighter
With the new pads in position, you can close the caliper. Return it to its original position by rotating it to the right. To fit over the new thick brake pads, you may need to squeeze the caliper bolt bushing in place and/or rattle the caliper in and out. Reinstall the bolt and tighten it once the caliper is aligned correctly. If you need to maintain the bushing in place while tightening the bolt, you may need to use a second wrench.
Step 5: Reattach The Wheel
Replace the wheel on the hub after matching the hub bolts with the wheel holes. If you don’t have enough clearance to get the wheel on, you may need to re-elevate the vehicle using the jack. To get the wheel snug against the hub, manually twist on the lug nuts.
If you want to tighten them up a little more, you can use your tire iron or breaker bar. Switch between opposing lug nuts to tighten the bolts. This aids in maintaining the wheel’s flatness against the hub. Otherwise, it may sway while driving and cause damage to your vehicle.
Remove the jack stand and drop the jack all the way down once the wheel is secured in place. Tighten all lug nuts to the manufacturer’s recommended torque. All tools should be cleaned up and put away.
Step 6: Check Your Brakes
The job is almost complete, but there is one more step to complete. The brake system must be tested and ensured to be in good operating order. Start your vehicle, but don’t engage the parking brake or move into drive just yet. There should be very little resistance when you press the brake pedal all the way to the floor.
This is normal since we forced the hydraulic fluid back to the master cylinder when we squeezed the piston to a more open position. Squeeze the brake pedal six to 10 times to regain braking pressure. Release your parking brake, shift into gear, and drive ahead carefully once you feel pressure on your brake pedal again.
To guarantee safe stopping, apply the brakes. Continue driving nearby while performing repeated braking checks to ensure that everything is in working order. Both forward and reverse brakes should be tested. It will take a few drives to seat the pads on the rotors, so avoid harsh braking for the first 10 to 20 miles.
Your brake pads have recently been replaced. Replace your other wheels and repeat the process. Once you have all of your tools and equipment, this should take between 15 and 30 minutes.
What Can I Do To Extend The Life Of My Brakes?
A variety of factors influence the longevity of your brakes, including:
Driving Style:
How hard do you generally brake? If you brake hard frequently, your brakes will need to be replaced sooner than someone who brakes gently. Using coasting to lessen your speed before traffic signals (such as understanding what does yield mean in driving) or junctions can also help your brakes last longer.
Environmental Factors:
Both city traffic and steep roads necessitate greater braking than long, straight roadways such as highways.
Quality Of Brake:
Brake quality varies substantially depending on the manufacturer. Some of them are more durable than others.
Brake Pad Replacement Facts:
- You can replace the brake pads in your car’s disc brake system quickly and easily without specialized tools, saving a lot of money.
- Front brake pads usually wear out more quickly than rear brake pads, so they need to be changed more often. So, make sure you’re considering to replace your front brake pads.
- Noise alone is not always the best indicator of worn brake pads, so it’s best to periodically inspect the thickness of the pads.
- If the front end of the car vibrates when you apply the brakes, your brake rotors may be warped or scored and may also need to be replaced or turned on a brake lathe.
- A general step-by-step guide to brake pad replacement involves removing the wheel, slider bolt, and old brake pads, replacing the retaining clips and sliding in the new brake pads, retracting the pistons, monitoring the brake fluid level, repositioning the caliper, and reinstalling the slider bolt.
- Disposable mechanic’s gloves, a jack and jack stands, lug wrench, C-clamp or length of wood, wrench, turkey baster, plastic tie, bungee cord, new brake pads, and brake fluid are required for brake pad replacement.
- Know your caliper assembly before replacing brake pads, and do one side of the car from start to finish before doing the other side.
- When retracting the pistons, steady pressure and patience are key to avoid nicking or tearing the rubber boot and seal that encircles the pistons.
- The cost of brake pad replacement varies based on the type of vehicle and braking system you have and whether you buy original, aftermarket or performance brake pads.
- It’s important to test-drive the car under safe conditions after brake pad replacement to ensure everything is working properly, being especially careful for the first few stops.
FAQs
How Often To Change Brake Pads
In general, there is no set time for changing your brakes because the lifespan of braking components varies greatly depending on the vehicle and driving style. Braking systems can last up to 80.000 kilometers or even more, but in heavy-duty applications, they can last as little as 25.000-30.000 kilometers. Your owner’s handbook offers more information on the recommended brake replacement intervals for your vehicle’s make and model. It’s vital to remember that if the brake discs are unevenly worn or badly scored, you should replace both the brake pads and the brake discs at the same time.
How Much To Replace Brake Pads
The typical cost of parts is between $35 and $150. Labor costs range from $80 to $120 for each axle on average. The typical cost of replacing brake pads per axle (parts + labor) is between $115 and $300. The majority of automobiles have two axles. Axles can be found in larger vehicles with more passengers and wheels. Every mechanic charges a different hourly rate, and manufacturers price their parts differently based on the materials used.
How To Check Brake Pads
Pay attention to your brakes as you come to a stop. Squealers are built into many brakes, and they will alert you when your brake pads are beginning to wear down. When your brake pads become too thin, these squealers will emit a loud, high-pitched sound. As you come to a halt, feel your brakes. If you press the brake pedal all the way to the floor and your automobile does not come to a complete stop, your brake pads may be worn out. Examine the brake pedal for pulsation or vibration. Your rotors could be damaged if your brake pedal pulsates or vibrates. A mechanic will be able to assess the problem more accurately. If your brake pads are worn, you may experience grinding when attempting to stop your vehicle.
How Long Does It Take To Change Brake Pads
A set of brake pads normally takes 30 minutes to an hour to replace. If you hire a professional to handle the job, expect to pay roughly an hour’s worth of labor. It’s worth mentioning that replacing brake pads as a novice can take anywhere between 3 and 4 hours or even longer.
How To Change Brake Pads And Rotors
Place the vehicle on a dry, flat area and secure the wheels with wheel chocks. Then, check the brake fluid reservoir by opening the hood. You’ll need to drain some of the liquid if it’s full. Raise the vehicle and take out the wheel. Bolts and calipers must be removed. Now, the old pads and rotor must be removed. Clean the mounting surface for the rotor. After cleaning the rotor, replace it. New brake hardware should be installed. Get new brake pads ready for installation. After inspecting the brake caliper and piston, compress it.
How To Know When To Change Brake Pads
If you hear continuous squeaking or screaming, it’s time to change your brake pads. When the indicator light illuminates, it’s another clue that it’s time to change your brake pads. When the brake pads on some kinds of cars become worn down, a sensor on the brake pad will activate. A heavy grinding metal sound is another clue that your brake pads need to be replaced. The fourth sign of brake pad replacement is a vibrating brake pedal. If stopping your automobile with your present brake pedal is difficult, and it vibrates or feels wobbly when you press down, your brake pads are worn out.
Final Verdict – How To Change Brake Pads
Your brakes are the most critical component of your vehicle. They won’t get you to 60 in any faster time or improve your ride, but they’re in charge of bringing you down from high speeds and might save your life in an emergency. Maintaining a good braking system necessitates keeping track of brake pad wear.
Low power braking, a high-pitched scream when braking in the dry, and excessive lever travel are all signs of worn or damaged disc brake pads. Now that you know how to change brake pads, you can easily determine when to replace brake pads or rotors on your car if you pay attention and plan ahead.

