During the removal or installation of a fastener, the head of the fastener might be stripped at any time. But what do you do if you come across a stripped bolt or nut in the middle of a project? Do you call your mechanic, who arrives with some fancy-looking pliers, or do you get a stripped lug nut remover?
What do you do if your technician is on vacation and you can’t find a stripped lug nut remover? The lug nuts on your vehicle will soon become stripped due to wear and strain. It can be difficult to remove for beginners. A rusted lug nut will also corrode the metal parts around it.
I’ve opted to show you how to remove a stripped lug nut without damaging the rest of the wheel for this post. To remove the worn-out nut from its socket, you’ll just need a few tools, stripped lug nut remover, and some patience. This tutorial will teach you how to use stripped lug nut remover to remove a rounded bolt. But first, let’s define a stripped bolt or nut, as well as what causes stripping and how to prevent it.
- Stripped Lug Nut
- How To Disassemble It?
- How Are Lug Nuts Stripped?
- What Are The Causes?
- Using Water Pump Pliers
- Use Of Locking Pliers
- How To Dispose Of It?
- Final Verdict
What Exactly Is A Stripped Lug Nut?
The edges of a stripped lug nut are often rounded off. If a lug nut is not torqued properly, the edges will be rounded off. When a person removes a lug nut with a socket, the nut is typically stripped.
Keeping track of all the fasteners, the ones that are tightened and loosened using wrenches, screwdrivers, and sockets in your vehicle can be difficult, and the lug nut and lug bolts are one of the most important fasteners in your vehicle. What are lug nuts and bolts, and what are they used for?
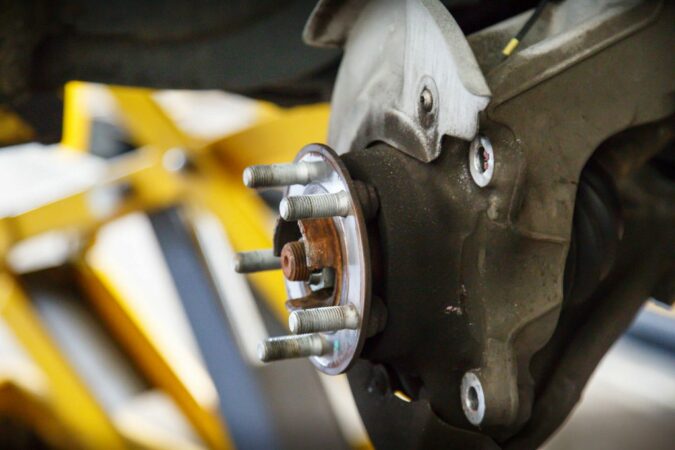
Lug nuts are made of chrome-plated steel. They usually secure the wheel’s hub to threaded wheel studs on the vehicle’s axle, ensuring that the wheel is secure and aligned correctly on the axle. Lug nuts come in various sizes, depending on the automobile model and axle used. The lug nut seat that connects the wheel to the car’s axle is determined by the wheel itself.
How To Disassemble A Stripped Lug Nut
Before going on to alternatives, we’ll start with the greatest way. If you’re still having problems, the fourth option we’ll describe will be utilized in conjunction with one of the other methods.
Method 1: Making Use Of A Stripped Lug Nut Remover
Using a purpose-built extractor is the first and best way to remove a stripped lug nut.
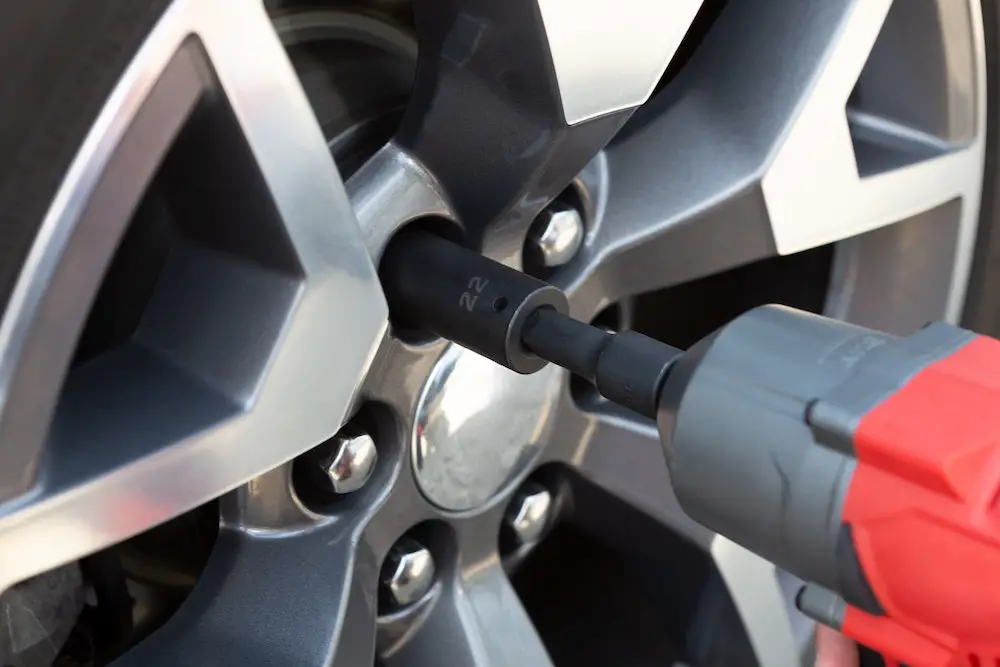
These socket-like gadgets are commonly referred to as lug nut extractors or stripped lug nut remover tools. They have the same wrench attachment as a socket, but they are normally designed stronger and have unique threading that allows them to hold the stripped lug nut.
Apply a generous amount of WD40 to the lug nut before using the extractor and let it do its job. Leave it for up to a day if possible, but you don’t have to if that’s not possible. Place the extractor socket over the lug nut that has been stripped. To install the extractor socket on the lug nut, use a hammer.
Simply turn it with a socket wrench once it is securely in place. The lug nut should come loose, and all you have to do now is take it out of the stripped lug nut remover. Clamp the lug nut in a vice and push it through with a screwdriver or chisel to remove it from the extractor. To get it out quickly, you might need a hammer.
Method 2: Make Use Of A Smaller Socket
If you’re in a rush and can’t find one, you can use a regular socket instead of a specialty extractor socket. Because some material has been scraped away from the lug nut, you will require a socket that is one size smaller than usual.
Because the smaller socket requires more force, you may need to use a stronger hammer. Apply the same procedure as with the extractor. You risk damaging the socket, especially if it’s a cheap one or made of a softer substance like cast aluminum.
Method 3: Making Use Of A Chisel
A riskier approach employing a hammer and chisel can be attempted if the stripped lug nut remover and socket procedures have failed. Apply a generous amount of WD40 before beginning and leave it to work for up to a day if feasible. If you can’t wait that long, don’t panic; the more time you give it to work, the easier it will be to remove the lug nut.
Take a hammer and a cold chisel (or something similar). Make a deep enough depressed groove on the lug nut with the chisel to keep it in place. Then gently tap the chisel with the hammer to push in a counterclockwise direction. Use greater force if the lug nut will not turn. However, be cautious because slipping could cause harm to the remainder of the wheel.
You can simply remove the lug nut by hand once it has loosened.
Method 4: Make Use Of A Blowtorch
If the lug nut proves to be too resistant, the fourth approach should be utilized in conjunction with one of the preceding ways, as previously stated. When you heat the lug nut and screw, they will expand at separate speeds. The lug nut loosens slightly due to the differential expansion and contraction, making other ways easier to accomplish.
Try heating it a few times and letting it cool in between. Then go back to whichever of the previous ways you tried to see if it worked. Before using a naked flame, make sure you’ve removed any WD40 or other lubricant you used for the other procedures for safety reasons.
How Are Lug Nuts Stripped?
The edges of a stripped lug nut are rounded, making it difficult to remove with a socket. When a lug nut is improperly torqued, either overtightened or over-torqued without following the nut’s lug specifications, it becomes stripped.
The following are some of the other causes of stripped lug nuts:
- Slippage occurs when a bigger socket is used to remove the nut.
- Incorrect torque values are used. To avoid damage, it’s a good idea to double-check your torque number and notify your repair.
- Corrosion ruins the threads and affects the exact shape of your lug nut when it is exposed to dirt, debris, and water, causing it to rust.
What Causes A Bolt To Be Stripped?
A bolt or nut can become rounded or stripped for various reasons. Here are a few examples:
1. Excessive Tightness
Applying too much torque to a nut or bolt might cause the tensile strength of the fastener to be exceeded. As a result, the wrench may snap off the bolt head or nut, flattening or smoothing out the corners.
2. Cross-Threading
When the threads of a bolt or nut do not mate properly with the threads of the threaded bolt hole or stud, cross-threading occurs. It can happen when you drive a fastener onto or into the mating surface at an angle. As a result, excessive torque applied to a cross-threaded fastener may cause its head to yield, rounding off the corners before you notice it.
A cross-threaded fastener will not turn as smoothly as one that has been correctly fitted. Additionally, it gets more difficult to turn when the fastener cuts across more threads. Not only can cross-threading strip the nut or bolt head, but it can also strip the threads. The threads, rather than the head, are the ones that become ruined first. To avoid destroying a fastener and the mating surface, it’s critical to pay attention to how smoothly it turns.
3. Corrosion Or Aging
Fasteners deteriorate with age and become brittle. If exposed to extreme conditions, they may corrode and rust. Exhaust bolts, for example, are prone to rusting due to their exposure to heat, humidity, and other oxidizing elements in the environment.
They can be considerably worse if you live in a salt-belt region where metal and metal fasteners are prone to rust. Old rusted and corroded fasteners are typically soft and flexible. When trying to loosen or tighten them, it is easier to strip.
4. Using An Incorrect Wrench Size
The edges will be stripped if you use a larger wrench or socket to loosen or tighten a nut or bolt. When the two metals slide over each other, the corners of your wrench may be damaged. Another tool that can strip bolts is an adjustable wrench, which lacks enough contact points. As a result, don’t use it to tighten or break loose fasteners.
5. Bolts And Nuts Of Poor Quality
If you use low-quality bolts and nuts, they will eventually strip due to their inability to endure a lot of stress.
6. Using An Air Impact Wrench To Free Stuck Bolts
Because it exerts continual short bursts of tremendous force onto a fastener to break it loose, an air impact wrench is ideal for breaking it loose. The impact wrench, on the other hand, is only useful for bursting stubborn bolts.
This is due to the fact that bolts are more fragile than nuts and require more force management. Unfortunately, air impact wrenches don’t have a lot of torque control, so your bolts could get stripped.
How To Keep Bolts From Being Stripped
Follow these basic steps to avoid stripping bolts and nuts when tightening or loosening them:
- Ensure you’re using the correct socket or wrench for your bolt or nut. Neither larger nor smaller.
- Overtightening nuts and bolts are not recommended. To deliver the proper amount of torque, use a torque wrench.
- Keep your fasteners from being cross-threaded. Do not apply them at an angle; instead, apply them straight up.
- Install the manufacturer’s suggested bolts.
- To loosen difficult bolts, don’t use an air impact wrench. Instead, use a ratchet wrench and bash it with a hammer. A hand impact tool is another option.
- Allow a stubborn nut or fastener to soak in penetrating oil for a few minutes before attempting to remove it.
- Before they freeze up, replace any old or rusted fasteners.
Despite the fact that these suggestions will help you avoid stripping fasteners, you should always be prepared to deal with the ones that do get harmed.
Using Water Pump Pliers To Remove Stripped Bolts And Nuts
Pliers for holding circular things like pipes and bolt fasteners are known as water pump pliers. Depending on the application, they feature moveable jaws that can be set to various widths. Water pump pliers are also available in various designs, sizes, and brands. The Cobra from Knipex Tools is people’s favorite.
The Knipex Cobras have a unique offset V-jaw design that allows them to hold pipes as well as bolts and nuts. The teeth of the jaws are positioned in different directions to allow them to forcefully bite down on a rusty or spherical fastener. Long handles on water pump pliers provide more leverage.
A self-locking mechanism is also a distinctive characteristic of the Knipex Cobra pliers. The self-locking feature, while not as powerful as locking pliers, lets you apply tension to a fastener without squeezing the handles constantly. Furthermore, applying more pressure to a workpiece causes the tool to grasp it more tightly.
To remove a rounded bolt or nut with water pump pliers, follow these steps.
Needed Tools:
- A pair of water pump pliers
- Penetrating oil
Instructions:
- A rusted fastener should be sprayed with penetrating oil. Its penetrating fluid helps to dissolve rust that has adhered to the fastening.
- The jaws of the water pump pliers can be adjusted to fit any size fastening.
- Clamp the fastener in place by squeezing the handles together. Make certain that you have a strong grip.
- To release the rounded fastener, turn the water pump pliers counterclockwise. To go through this, you’ll need some muscle. You don’t have to keep squeezing the handles if you’re using Knipex Cobras. Release the lower handle after applying adequate pressure to the fastener.
- Remove the fastener entirely by ratcheting it.
A set of locking pliers can be used if the water pump pliers do not remove the rounded bolt.
Locking Pliers For Removing Stripped Bolts
Locking pliers are pliers that use a locking mechanism to grip an object and not let go. After the business that designed and patented the locking mechanism, Vise-Grips are another name for them. Vise Grips pliers come in various forms and sizes to suit a variety of purposes. To remove a stubborn bolt with a corroded head, follow these procedures.
Equipment And Supplies
- Locking pliers with a straight jaw
- Penetrating fluids such as WD40 or PB Blaster
Steps To Take:
- Allow 30 minutes for penetrating oil to seep into the trapped rounded bolt or nut. Rust, erosion, and other impurities on a seized fastener dissolve with penetrating oil, making it easier to remove.
- Prepare your locking pliers. The flat sides of bolt heads and nuts are easily gripped with straight jaw-locking pliers. Furthermore, a set of locking pliers with a longer length has higher leverage than a pair with a shorter length. A 9′′ or 10′′ locking plier is ideal for automotive applications. Needle-nose locking pliers would be ideal for extracting a bolt from a deep location.
- Using locking pliers, grasp the nut or bolt head. To grab the stripped nut or bolt head tightly, just adjust the jaws of the locking pliers. Squeeze the handles together and turn the adjustment screw a few times clockwise until they are snug against the bolt or nut.
- Place the pliers in place and secure them. Squeeze the handles together to lock the pliers in place once the jaws of your locking pliers are snug on the fastener. A clicking sound should be heard.
- Apply as much force as possible until the fastener gives way. Continue twisting until you’ve extracted all of the material.
- Open the locking pliers to release the fastening. To remove the pliers and release the fastener, press the release lever against the adjacent handle after removing the rounded bolt or nut.
Because you don’t have to squeeze the handles after they’re secured in place, locking pliers are great for removing stuck spherical fasteners. This allows you to apply as much torque as possible to the broken fastener and tear it away. Furthermore, the locking mechanism makes removing hard nuts and bolts easier on your hand.
How To Dispose Of A Stripped Lug Nut That Won’t Come Off
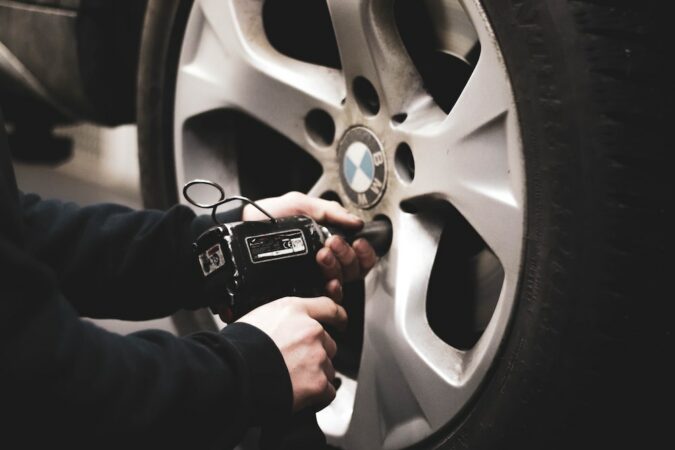
The removal of a stripped lug nut is not difficult. You should be able to remove your lug nuts in no time if you use the right equipment and follow the correct methods. We’ll focus on concerns with standard lug nuts instead of lug bolts, which are fitted onto wheel studs. However, lug bolts that screw into the wheel hub are used by various European car companies, including BMW, Volkswagen, and Audi.
You’ll need the following Tools:
- Penetrating Oil
- Power Drill
- Lubricant For Drilling
- Safety Glasses Are Required
- Iced Water
- Drill Bits In The Sizes Of 5/64 Inch And 7/64 Inch
- 6 Pt Socket With A ½ Inch Drive
- Breaker Bar With A ½ Inch Drive
- Set Of Lug Nut Extractors
- A 3-Foot Length Of Pipe Or A Floor Jack
Stripped Lug Nut Remover, Step 1: Ensure That Your Vehicle Is Parked In A Level And Secure Location
Before you begin the process of removing a lug nut, make sure you have enough space to move around freely. If you’re working in the garage, it’s fine. Before attempting to remove a stripped lug nut while changing a flat tire on the side of the road, we strongly advise you to push or tow your car to a gas station or an empty parking lot.
Set the car to Neutral or Park if it’s manual, and pull the handbrake, especially if it’s parked on a slope or downhill. You’ll need to make sure the car is firmly anchored because you’ll be using a lot of force to remove your seized lug nut.
Stripped Lug Nut Remover, Step 2: Drill With A Penetrating Oil
To begin the process of lug nut removal, immerse the nut and stud with penetrating oil. To allow the oil to penetrate the threads, drill the closed head of the nut. Drilling will be considerably easier with lubricant.
Keep some cool water on hand in case something gets too hot. Simply put on a set of safety glasses and use a center punch and hammer to indent the lug nut in the middle. Start by drilling with the smallest drill bit and wetting the tip with oil.
Maintain control of the drill motor with both hands. Drilling should be done slowly and cautiously. If the oil heats up, it will begin to smoke, so try to halt drilling from time to time. Place the bit in the water to cool it down. After cleaning away chips, reapply penetrating oil to the hole and bit.
Replace the 7/64′′ bit in the drill motor and repeat the drilling process. Because the bit may become caught in the hole and cause the drill to rotate, you’ll want to keep your drill motor firmly in position. Drill to the stud’s top section once again.
The stud and nut can now be bathed in WD-40 in a separate reservoir. Insert the WD-40 tube into the hole and begin wrapping it with a paper towel or shop towel at the surface of the nut to catch any back spray. Squirt some lubricant into the hole.
Spray WD-40 around the base of the lug nut as well. Soak the lube overnight to improve its effectiveness if you have time. The next morning, squirt extra lubrication into the nut’s base and hole. You can only soak it for 5-10 minutes if you don’t have enough time. It’s important to note that WD-40 will not help corroded lug bolts.
Stripped Lug Nut Remover, Step 3: Use A “Snug” Socket Or A Lug Nut Extractor To Remove The Lug Nuts
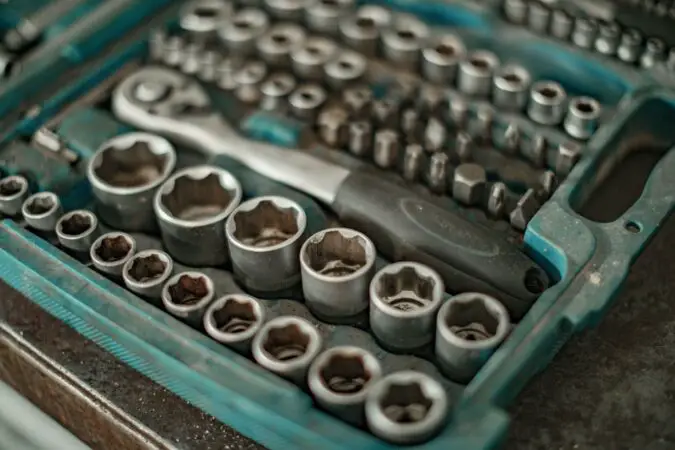
Choose a 6-point socket that fits the nut and has a ½ inch drive. A deep socket may be required. If the nut head won’t accept a standard socket, an extractor socket may be required. Start by hammering a socket into a place that is the right size for the shape.
Stripped Lug Nut Remover, Step 4: Loosen It With A Breaker Bar
A ½ inch drive breaker bar with a length of 18-24 inches should be used. Install it such that the handle is horizontal and can be raised or pressed downward to loosen or tighten the nut. If a floor jack isn’t available, use a pipe to provide force to the breaker bar’s handle.
To fit snuggly, the pipe must be somewhat larger than the breaker bar; consequently, 3 ft is an appropriate pipe length in this case. Position the breaker bar 10 degrees to the left of the nut and 10 degrees upward. You’ll need to push down to loosen the nut. To apply force with your weight, softly step onto your pipe. To keep your balance, you can always hold the car’s side.
Stripped Lug Nut Remover, Step 5: Remove The Wheel As Usual
Start loosening the remaining lug nuts after you’ve removed the obstinate one. It will now be much easier to jack up the automobile, support it, and remove the wheel as needed.
Stripped Lug Nut Remover, Step 6: Replace All Of The Bolts With New Fasteners
After removing the rusty or seized lug nut, you’ll need to acquire and install new fasteners for the entire bolt pattern, as replacing merely the broken fastener may cause some problems. Wheel studs with rusty or seized lug nuts should be inspected.
To begin, use a wire brush to clean the threads. Visually check the threads with a bright light; they should be clean and smooth. Replace the lug nut by threading it all the way into the threads. Any stud that shows signs of wear or fails the aforementioned analysis should be replaced. If you’re not sure about a stud’s condition, it’s best to replace it.
Stripped Lug Nut: 3 Ways to Remove It
- A stripped lug nut occurs when it is torqued beyond the manufacturer’s specification, causing the cap to separate from the lug nut and allowing moisture to rust and stick to the hub assembly.
- To remove a stripped lug nut, you may need additional tools, including a breaker bar, socket, pipe, powerful impact wrench, and drill bit.
- When using a breaker bar and socket, a smaller socket may be needed to fit the smaller corners of the stuck lug nut, and a pipe can be added for extra leverage.
- If a breaker bar and socket fail to remove the lug nut, a powerful impact wrench can be used to provide up to 250 foot-pounds of torque to loosen the nut.
- If the impact wrench fails to remove the lug nut, a drill bit can be used to drill through the center of the nut, starting with smaller-sized bits and working up to larger ones while regularly dipping the bit in oil to prevent overheating.
- While drilling, aim for the center of the lug nut and use a center punch to prevent the bit from slipping.
- If the drilling is off-center, a burr tool with a die grinder can be used to correct the hole.
- After drilling, use a parts cleaner to remove any chips filling the hole.
- The wheel may slide out easily after drilling, but if the lug nut remains stuck, it can be removed with channel lock pliers, a torch, or an air hammer.
- Avoid using air hammers, air chisels, or torches to remove stripped lug nuts as they can easily cause serious damage to the wheel.
Final Verdict – Stripped Lug Nut Remover
A combination of two ways is likely to assist you in solving your stripped nut issue. However, you must exercise extreme caution while using potentially hazardous items such as grinders, blowtorches, sockets, and pipe wrenches. Seek assistance from a professional if you are unfamiliar with any of the stripped lug nut removers. Protect your car from rust by covering exposed parts, using the proper socket size, and adhering to the lug nut standards.
Knowing how to remove rounded lug nuts and having the Stripped lug nut remover to do so will come in handy at some point, but it is a hassle that we should avoid. Prevention is always preferable to cure. Knowing the torque specifications for your wheel nuts is essential, as it does not use equipment designed for them.


