
Cross threading your car’s lug nut is a shockingly easy – yet, pretty annoying – mistake to make. So, how to remove a cross threaded lug nut, and how do you do it without damaging the wheel studs?
Having cross threaded more lug nuts than I could possibly count over the years, removing a cross threaded lug nut requires a lot of patience, a very careful and delicate approach, and using the right techniques.
The easiest technique is by simply spraying on some penetrating lubricant to loosen the cross threaded lug nuts. Otherwise, you might have to rely on more advanced techniques to remove those seized lug nuts.
This may include… 1) applying heat to expand the lug nut metal and loosen it, 2) drilling a hole into the lug nut, or 3) drilling more holes into the lug nut to split it (though, this latter method may damage the studs).
How To Remove Cross Threaded Lug Nut
With that in mind, here’s a quick guide that I’ve put together to help you figure out how to remove a cross threaded lug nut (click on each of the contents below to skip ahead to that specific section):
- Step 1: Visual Inspection & Analysis
- Step 2: Choosing Some Penetrating Oil
- Step 3: Lubricating The Seized Lug Nuts
- Step 4: Applying Some Gentle Pressure
- Step 5: Maintain A Steady Pressure
Dealing with a cross threaded or seized lug nut is a pretty frustrating experience for any car owner. Trust me, I know this all too well. It can occur due to over-tightening, rust, or misalignment during installation.
Before diving into the removal process, it’s crucial to understand that patience and the right technique are key to avoiding damage to your wheel studs. To begin, it’s wise to first assess the state of the lug nuts.
Step 1: Visually Inspection The Lug Nuts
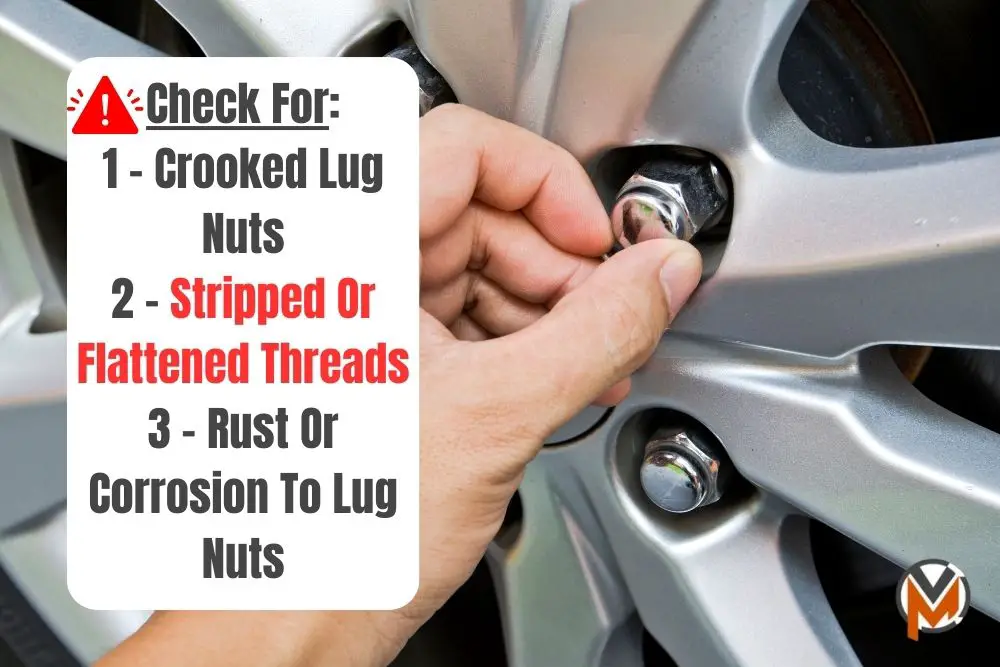
- Close Examination – It’s a good idea to whip out a flashlight for a better view. Check how the lug nut aligns with the stud; is it crooked or does it appear to be on straight?
- Thread Condition – Once you’ve made the initial examination of your lug nuts, look for any visible damage to the threads. If you notice stripped or flattened threads, this indicates severe cross threading.
- Partial vs. Full Engagement – Now, if your car’s lug nut is only partially threaded, you might be able to back it off without cutting. Fully seized nuts, especially those that are cross threaded, might have damaged the threads beyond simple repair. So, bear this in mind before you proceed.
- Rust and Corrosion – In addition, while you’re here, you should also assess the level of rust. Surface rust is a minor issue, but deep corrosion can fuse the nut to the stud.
Step 2: Choosing The Right Penetrating Oil
- Selecting the Right Oil – If you’re looking for suggestions on penetrating oil…
- PB Blaster is known for its deep penetration and rust-dissolving properties. This is my recommendation as the best penetrating oil for this task.
- On the other hand, WD-40 is much more readily available. And, it’s also pretty effective, especially for light to moderate seizing or cross threading.
- Another nice alternative is Liquid Wrench or even homemade mixtures like a blend of ATF and acetone can be used in a pinch.
Step 3: Lubricating The Seized & Cross Threaded Lug Nut
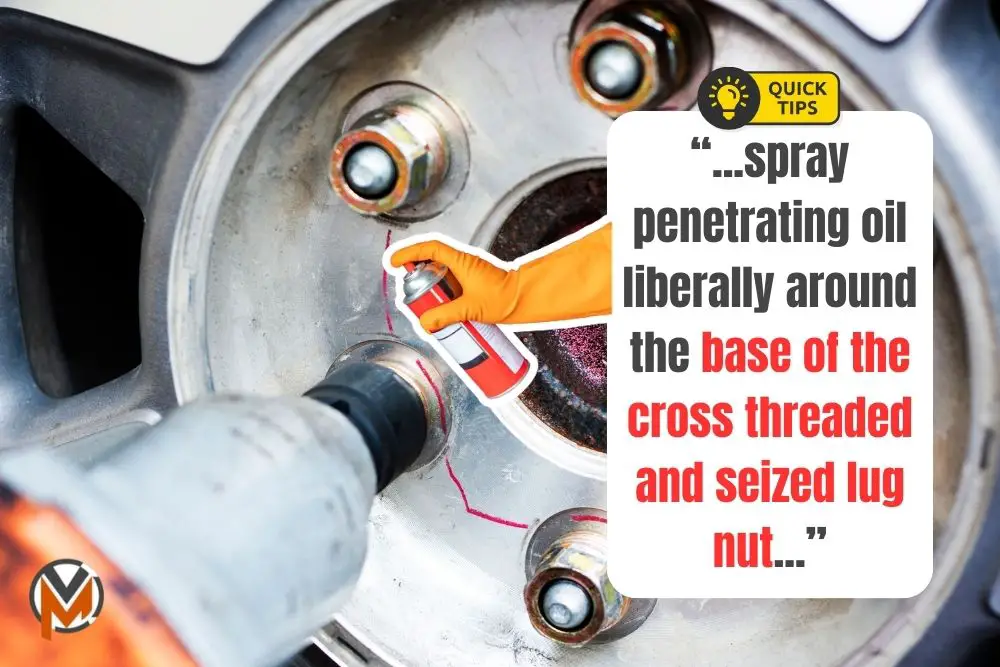
- Generous Application – Once you have your penetrating oil of choice, spray the oil liberally around the base of the cross threaded and seized lug nut. You should aim to get the oil into the lug nut threads from all the accessible angles.
- Underneath Approach – If possible, you could also apply from the backside of the wheel, where your wheel studs protrude. In so doing, you can ensure full coverage around the lug nuts, wheel studs, and threads.
- Patience is Key – It’s vital to give it some time to allow the oil to penetrate for at least 10-15 minutes. For a heavily seized set of lug nuts, a longer wait time or multiple applications might be necessary.
- Reapplication – However, should the first application not seem to have an effect, you can try to apply again and wait. Sometimes, the repeated application could help to break down the corrosion more effectively.
Step 4: Applying Some Gentle Pressure On The Lug Nuts
- Using a Breaker Bar – While you’re letting the penetrating oil do its thing, it’s time to grab some tools. My recommendation is to choose a breaker bar with a long handle. The added length provides more leverage, thus reducing the amount of force you need to apply.
- Correct Socket – With your breaker bar, it’s also important to make sure you have the right socket installed. Ensure that you’re using the correct-sized socket for your lug nut to avoid rounding it off.
- Gradual Increase – When you’re applying pressure on the cross threaded and seized lug nuts, you’ll have to start with gentle pressure. Then, from there, gradually increase the amount of pressure you’re applying. in addition, make sure you pay close attention to how the lug nut responds when you’re putting pressure.
Step 5: Maintain Constant & Steady Pressure
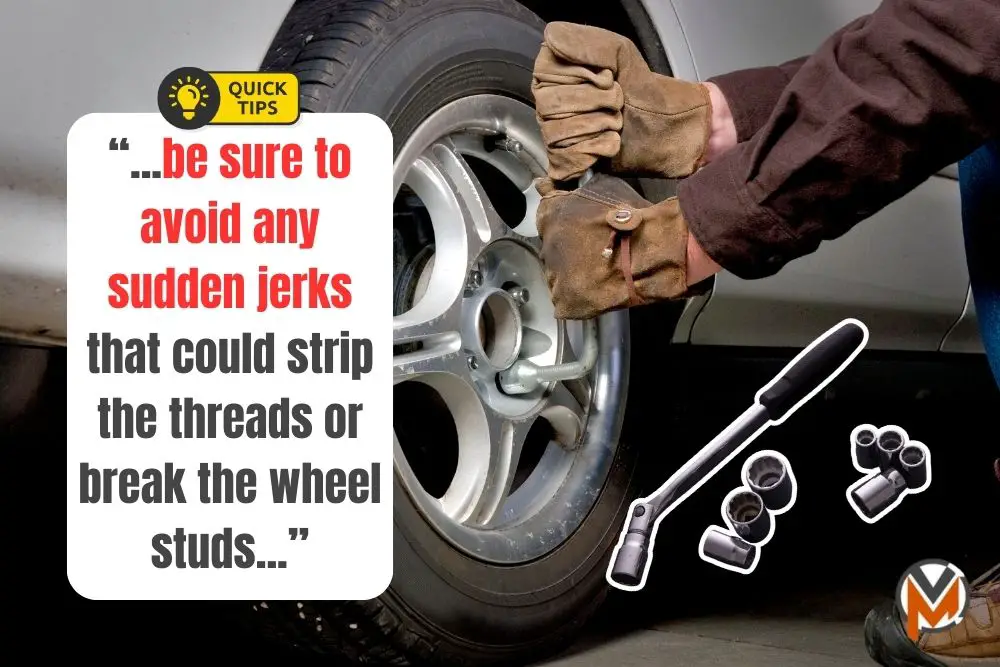
- Steady Motion – As you’re applying pressure, one neat trick is to maintain a steady, continuous motion. On top of that, be sure to avoid any sudden jerks that could strip the threads or break the wheel studs.
- Resistance Check – While you’re monitoring how much progress you’re making, if the nut starts to give way, continue with steady pressure. If it remains immovable or you feel an increase in resistance, stop. If you’re putting any more pressure on an immovable lug nut, it could cause more damage to the threads.
- Re-lubrication – At any sign of excessive resistance, pause and apply more penetrating oil. Sometimes, heat generated by the initial attempt could possibly help the penetrating oil penetrate deeper.
If you’re still having difficulties with trying to remove those cross threaded and seized lug nuts, here are a few advanced techniques that you can use as a last resort:
- Technique 1: Apply Some Heat
- Technique 2: Drill A Hole Into The Lug Nut
- Technique 3: Splitting The Lug Nuts
Technique 1: Applying Some Heat
The idea here is that applying heat can help to expand the lug nut metal, and make it easier to remove…
- Using a Torch:
- Selecting the Right Torch – A small, handheld propane torch is typically sufficient. Ensure that it has a controllable flame to manage the heat output.
- Technique – Next up, circle the flame around the perimeter of the lug nut. This indirect heating helps to expand the nut without directly exposing the stud to high temperatures.
- Distance – Keep the torch at least a few inches away from the lug nut to distribute the heat evenly and prevent warping.
- Heating Duration:
- Timing – Apply heat for about 15-30 seconds. Watch the lug nut closely; if it starts to change color, stop heating immediately.
- Cooling Down – After heating, let the nut cool for a minute before attempting removal. This cooling period allows the metal to contract slightly. Thus, it could help you potentially break the corrosion bond.
- Safety Precautions:
- Protective Gear – Wear some heat-resistant gloves and safety glasses. Hot metal and sparks could cause some serious burns and injury.
- Surrounding Area – Ensure that there are no flammable materials nearby. To be extremely safe, I’d advise that you keep a fire extinguisher accessible in case of an emergency.
- Wheel and Tire Safety – Additionally, avoid prolonged exposure to heat on any single spot of the wheel or tire to prevent damage.
Technique 2: Drilling The Lug Nuts
By drilling a hole into the seized and cross threaded lug nuts, you can get more penetrating oil deep into the wheel studs and threads…
- Selecting a Drill Bit:
- Size Consideration – It’s a good idea to choose a drill bit that is slightly smaller than the lug nut’s diameter. This ensures you don’t accidentally drill into the wheel studs.
- Material – Use a high-speed steel (HSS) drill bit for its durability and ability to cut through tough metal. It’s the one that I’ve found to be most effective with removing cross threaded lug nuts.
- Drilling Process:
- Centering – Start by making a small indentation in the center of the lug nut with a center punch. This helps to keep the drill bit from wandering around.
- Drilling Technique – The ideal technique here is to drill straight into the cross threaded lug nut, maintaining a steady speed. It’s important to apply only light pressure to avoid the bit breaking.
- Depth Control – However, it’s also crucial to only drill only as deep as the nut itself, not beyond. This is to avoid damaging the wheel stud or its surrounding area.
- Applying Lubricant:
- Post-Drilling – Once a hole is drilled into the lug nuts, apply more penetrating oil into it. This helps to reach deeper into the threads.
- Waiting Time – Allow the penetrating oil to seep in for several minutes before attempting removal again. For this, refer back to Step 1 to Step 5 from earlier, and see if it works now.
Technique 3: Splitting The Lug Nuts
Note, this is best saved as a last resort, as it can cause some damage to your wheel studs and threads…
- Drilling Holes for Splitting:
- Placement – Drill two small holes directly opposite each other on the lug nut’s circumference. These holes will aid in weakening the seized and cross threaded lug nut structurally.
- Depth – As for how deep you should be drilling, ensure the holes are deep enough to facilitate splitting but not so deep as to damage the wheel studs.
- Using a Chisel or Cut-off Wheel:
- Chisel Method – Next up, you’ll need to place a sharp chisel into one of the drilled holes. Then, gently tap it with a hammer, and apply increasing force until the lug nut splits.
- Cut-off Wheel Method – If you’re instead using a cut-off wheel, carefully slice through the nut between the two holes. Although, this method requires a steady hand and eye protection.
- Caution:
- Risk Assessment – Be aware that these methods can potentially damage the wheel studs and your actual wheel. They should only be used when other methods have failed.
- Final Resort – Consider these techniques as the last line of action when all else fails. On top of that, a high degree of caution is required.